Adding Note
You can use notes to update additional information to requests either for reference or for communication with requesters and technicians.
To add a note,
-
Go to the Requests tab and then click the subject line of the desired request.
-
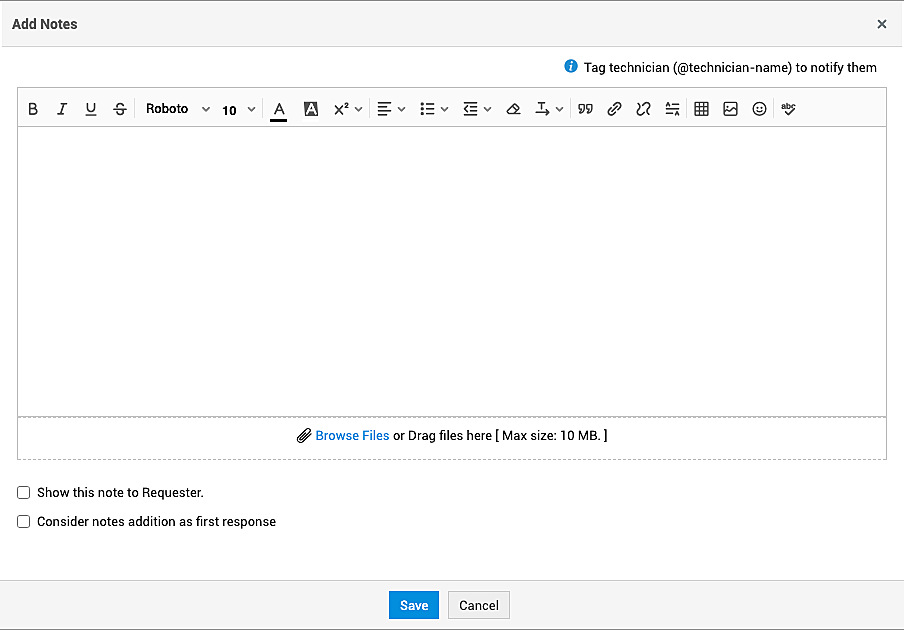
Click Actions > Add Notes. Alternatively, you can click Add Notes in the Conversations box.
-
In the editor that appears, enter the required information and then click Add Note.
You can tag technicians by typing @ followed by the technician's name. You can also tag the specific users using the placeholders followed by the @ symbol. The available placeholders are as follows.
|
Placeholder |
Description |
|
$TicketOwner |
This is replaced with the name of the technician to whom the request was assigned. |
|
$Requester |
This is replaced with the name of the requester. |
|
$On_Behalf_of_User |
This is replaced with the technician on whose behalf the request was created. |
|
$Editor |
This is replaced with the name of the technician mentioned in the Editor field of service templates. |
You can also add a note from the request list view by invoking the note icon ![]() beside the corresponding request.
beside the corresponding request.
-
To add attachments, click Browse files or drag files to the attachment area. You can add images to notes either as attachments or as inline images.
-
To make notes visible to the requester, select the Show this note to Requester checkbox.
-
To mark a note as the first response, select Consider notes addition as first response checkbox.
-
All placeholders and tagged users will be rendered in hypertext that shows user details upon clicking on it. If the tagged user is not available or configured (in the case of $On_Behalf_of_User or $Editor), then those placeholders/names will be rendered in plaintext.

-
There is no count limit for notes. You can view the notes under the Conversations section inside the request details page.
-
Recently added notes will be displayed first, followed by all other notes.
-
You can modify or delete the note using the corresponding buttons.

