Setting up Zoho Flow Agent
Zoho Flow's On-Prem Agent is required to create workflows in ServiceDesk Plus MSP through Zoho Flow.
Creating a new agent
There are two ways in which you can get started:
From Zoho Flow Settings
1. Log in to your Zoho Flow account.
2. In the Settings section, click Agents, then Create.
3. Select Connect On-Prem apps(On-Prem Agent).
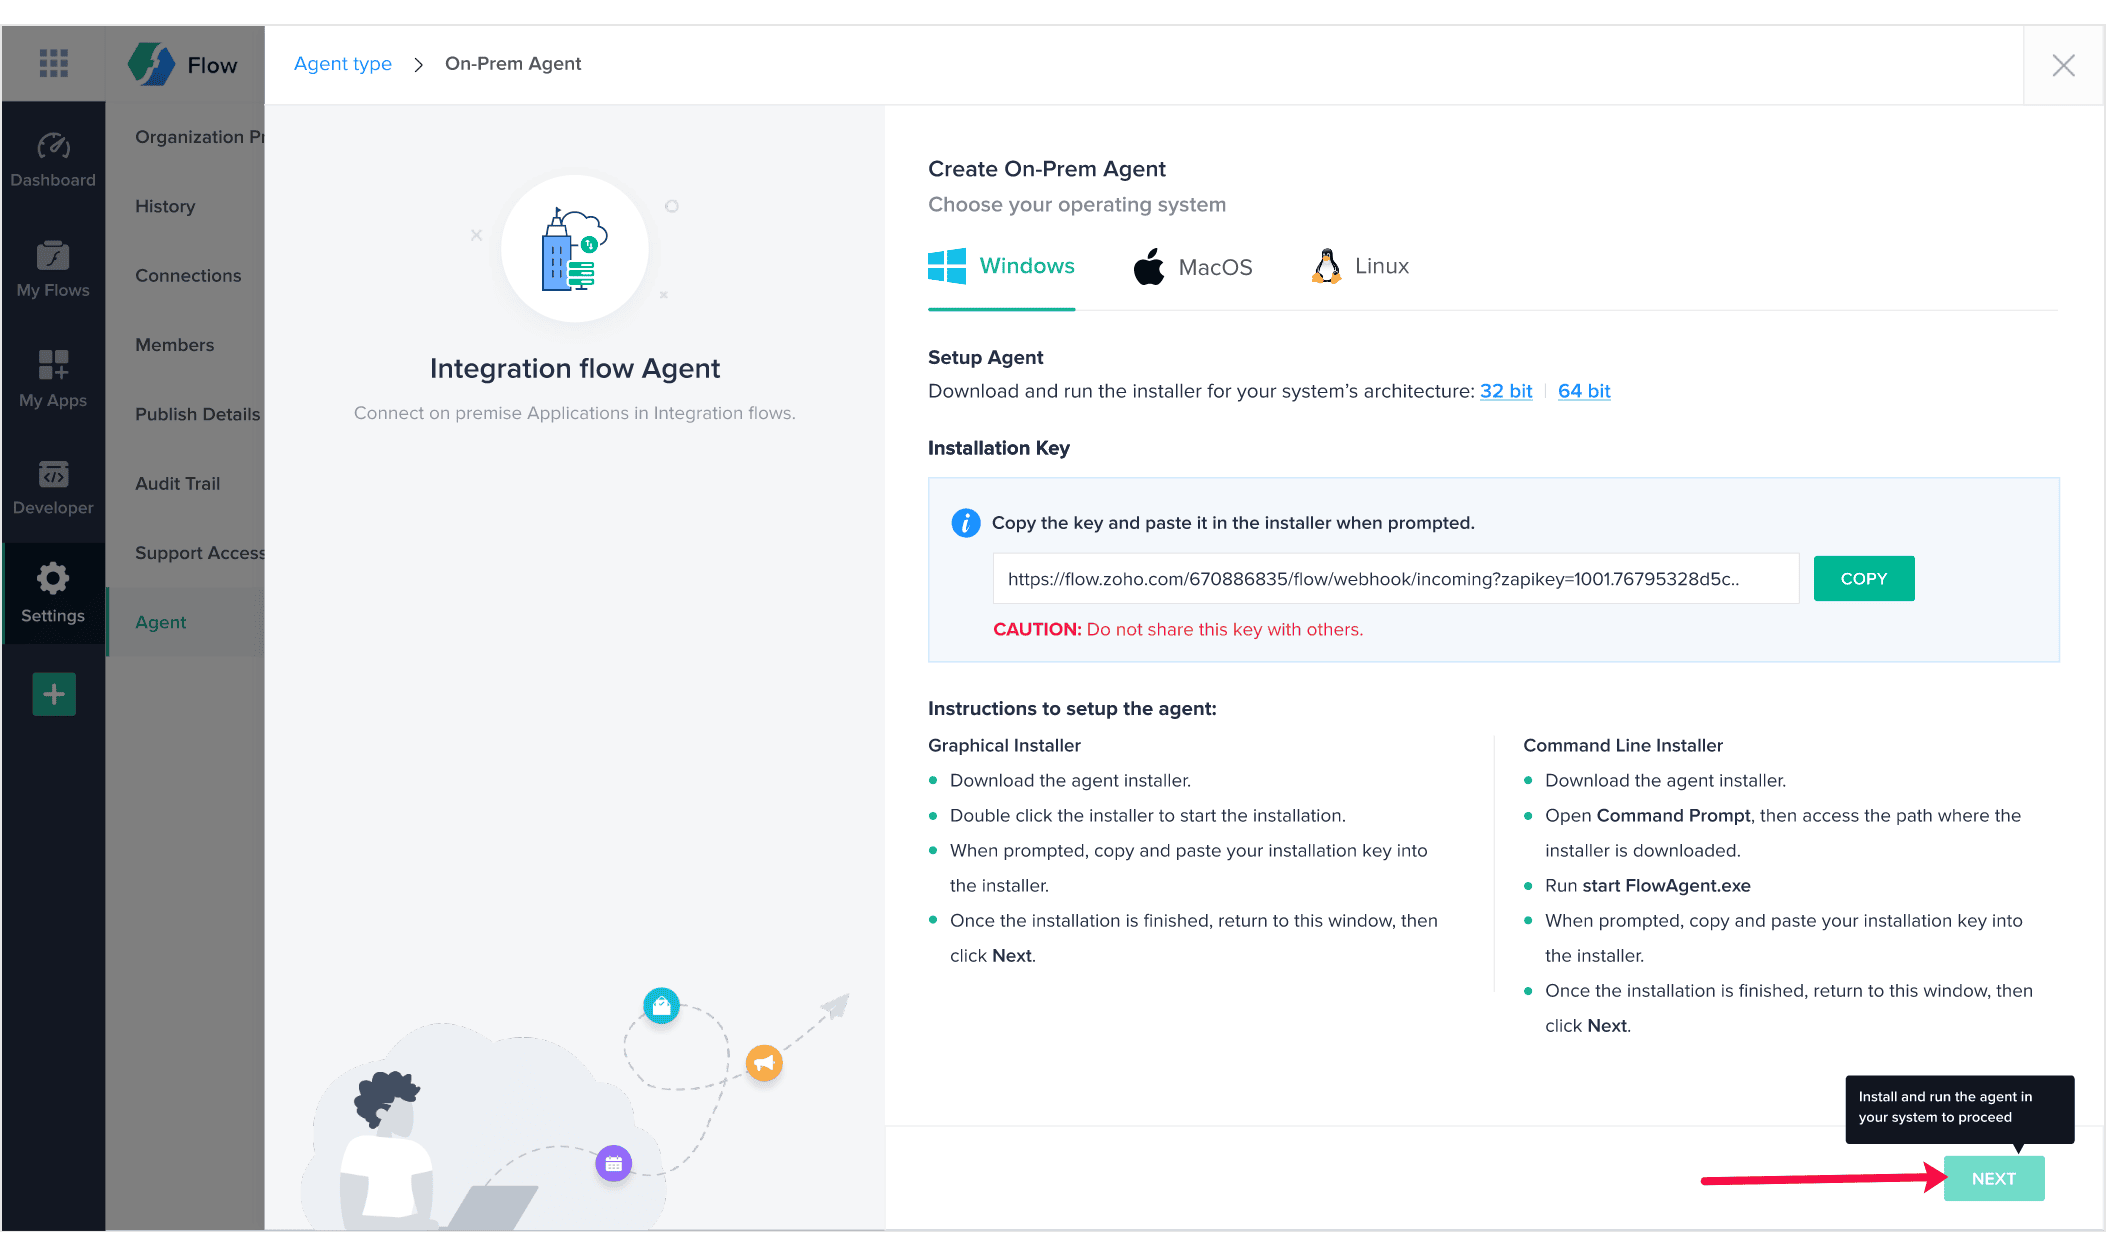
4. In the dialog window that appears, select the operating system of your machine, then click on the download link suitable for its architecture.
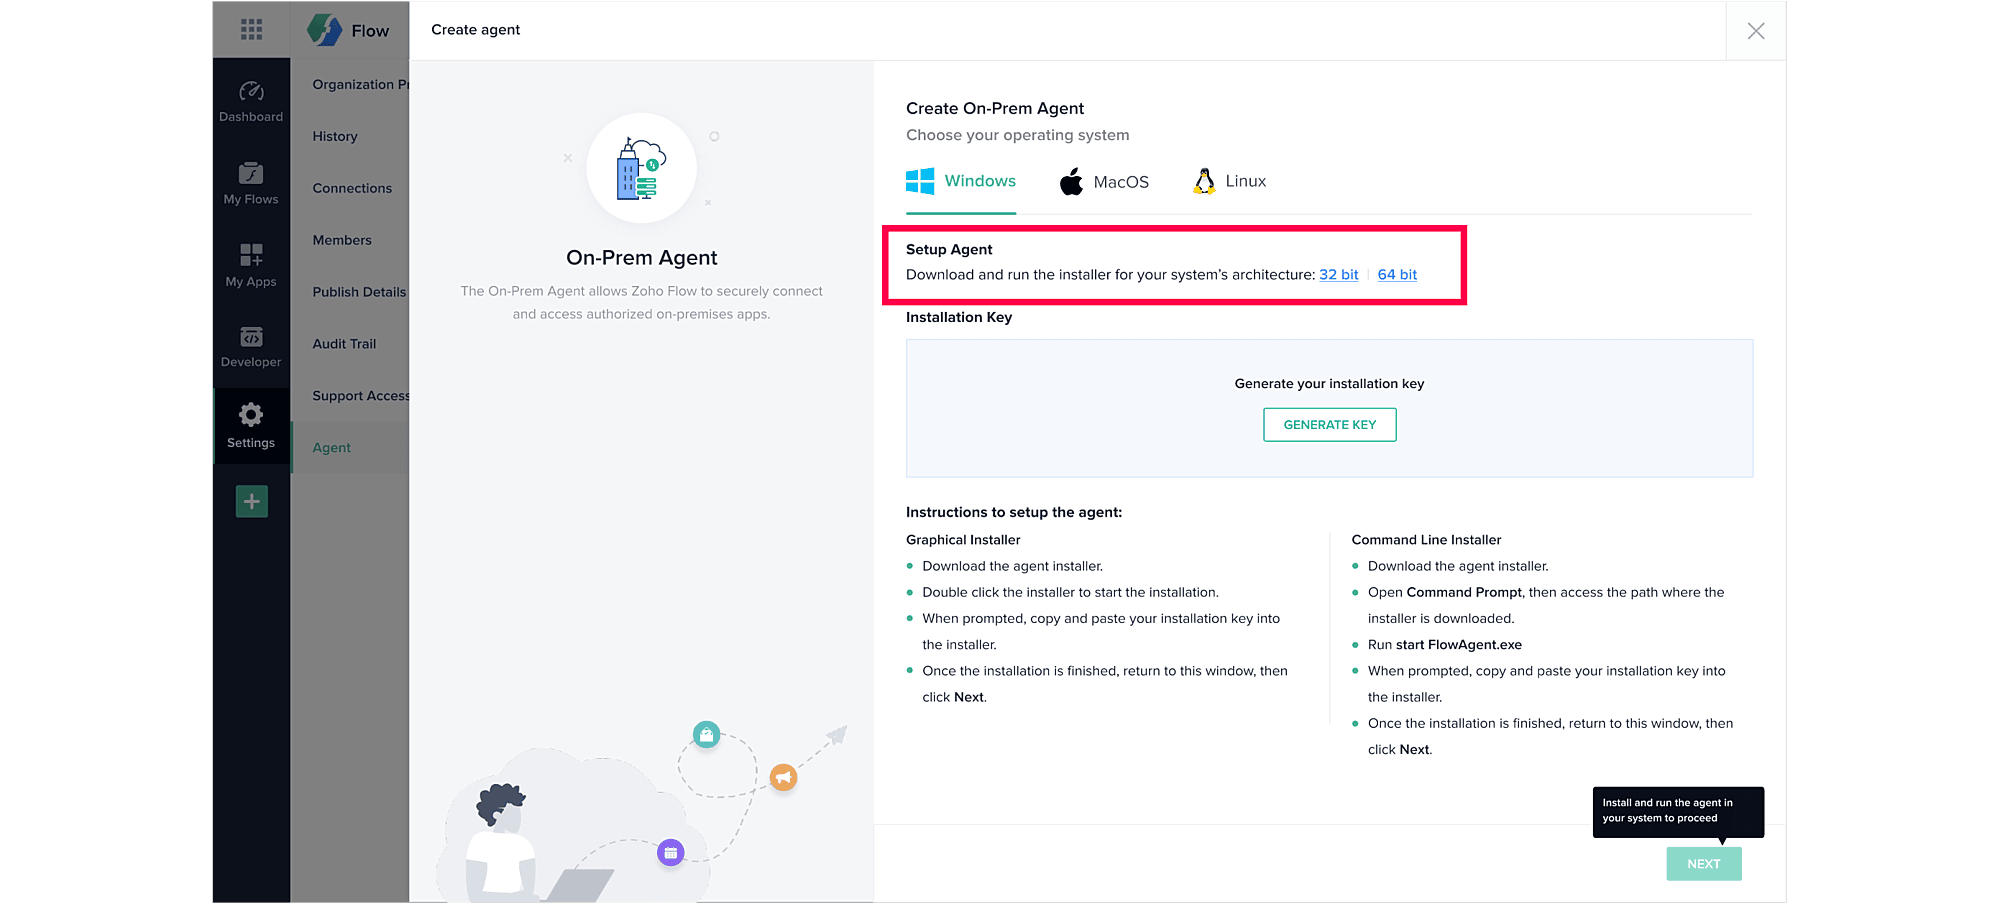
5. Click Generate Key to generate a unique key for the new agent. In the pop-up window that appears, click Accept to continue. Note: The installation key can only be generated by either an admin or the owner of the organization. Once the key is generated, it will be available for the other users in the organization.
6. Follow the on-screen instructions provided for your selected operating system to install and run the agent.
7. Once you've successfully set up the agent, click Next.
8. Then, click Done.
While configuring an on-premise app's trigger or action:
While setting up a flow, if you select an on-prem app for the trigger, or if you select an on-prem app's action, you'll need the On-Prem Agent.
1. If you've already created an agent, select the agent from the On-Prem Agent dropdown.
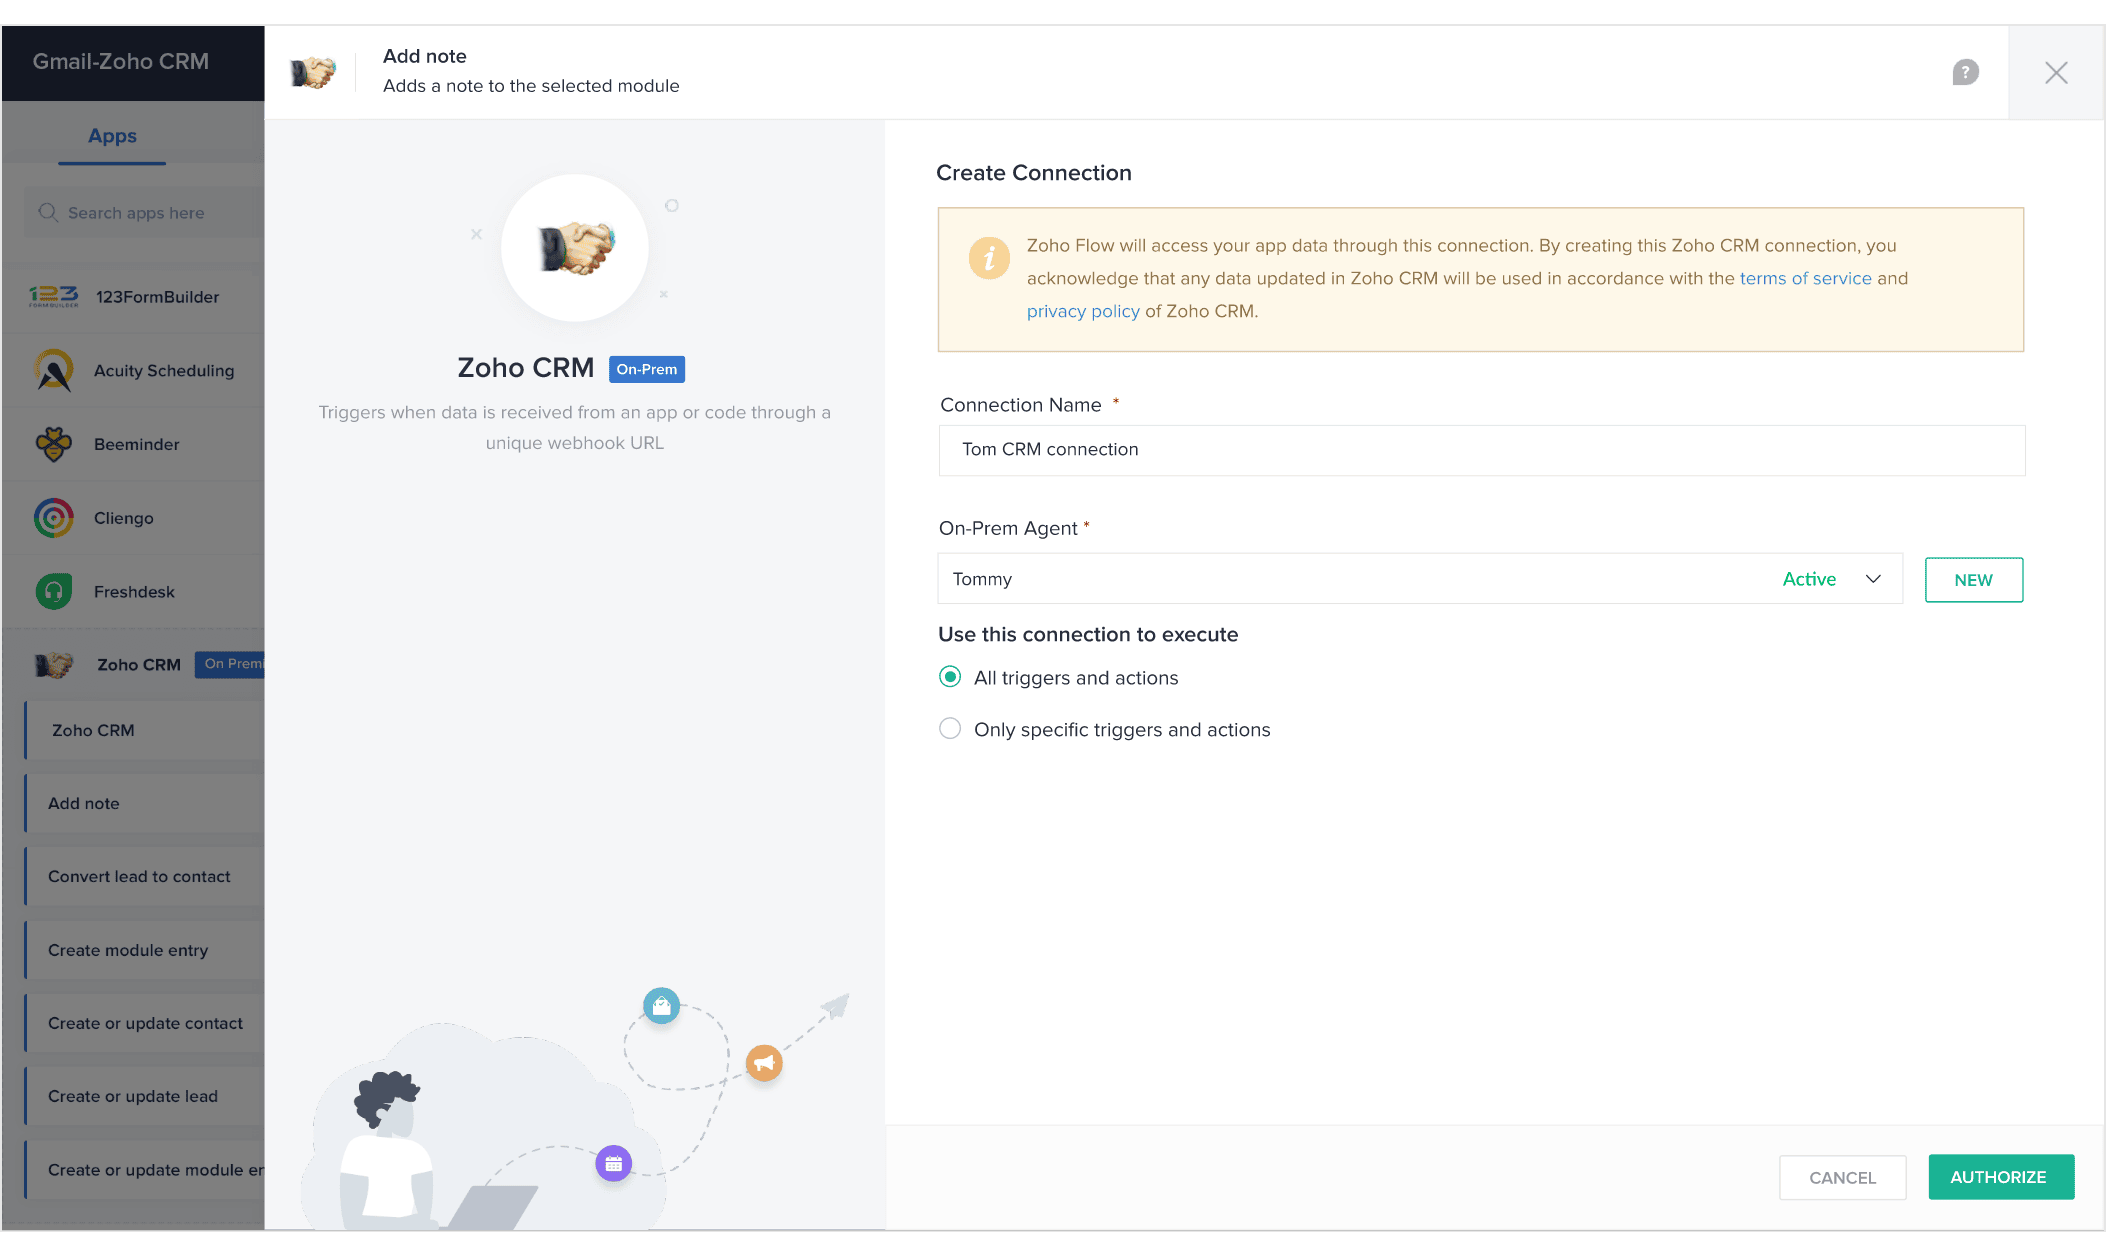
2. If you haven't yet created an agent, click New.
3. Select the operating system of your machine, then click on the download link suitable for its architecture.
4. Click Generate Key to generate a unique key for the new agent. In the pop-up window that appears, click Accept to continue.
5. Follow the on-screen instructions provided for your selected operating system to install and run the agent.
6. Once you've successfully setup the agent, click Next.
7. Then, click Authorize.
Installing the agent in your system
For Windows:
There are two ways to install the On-Prem agent in your Windows operating system:
Graphical Installer
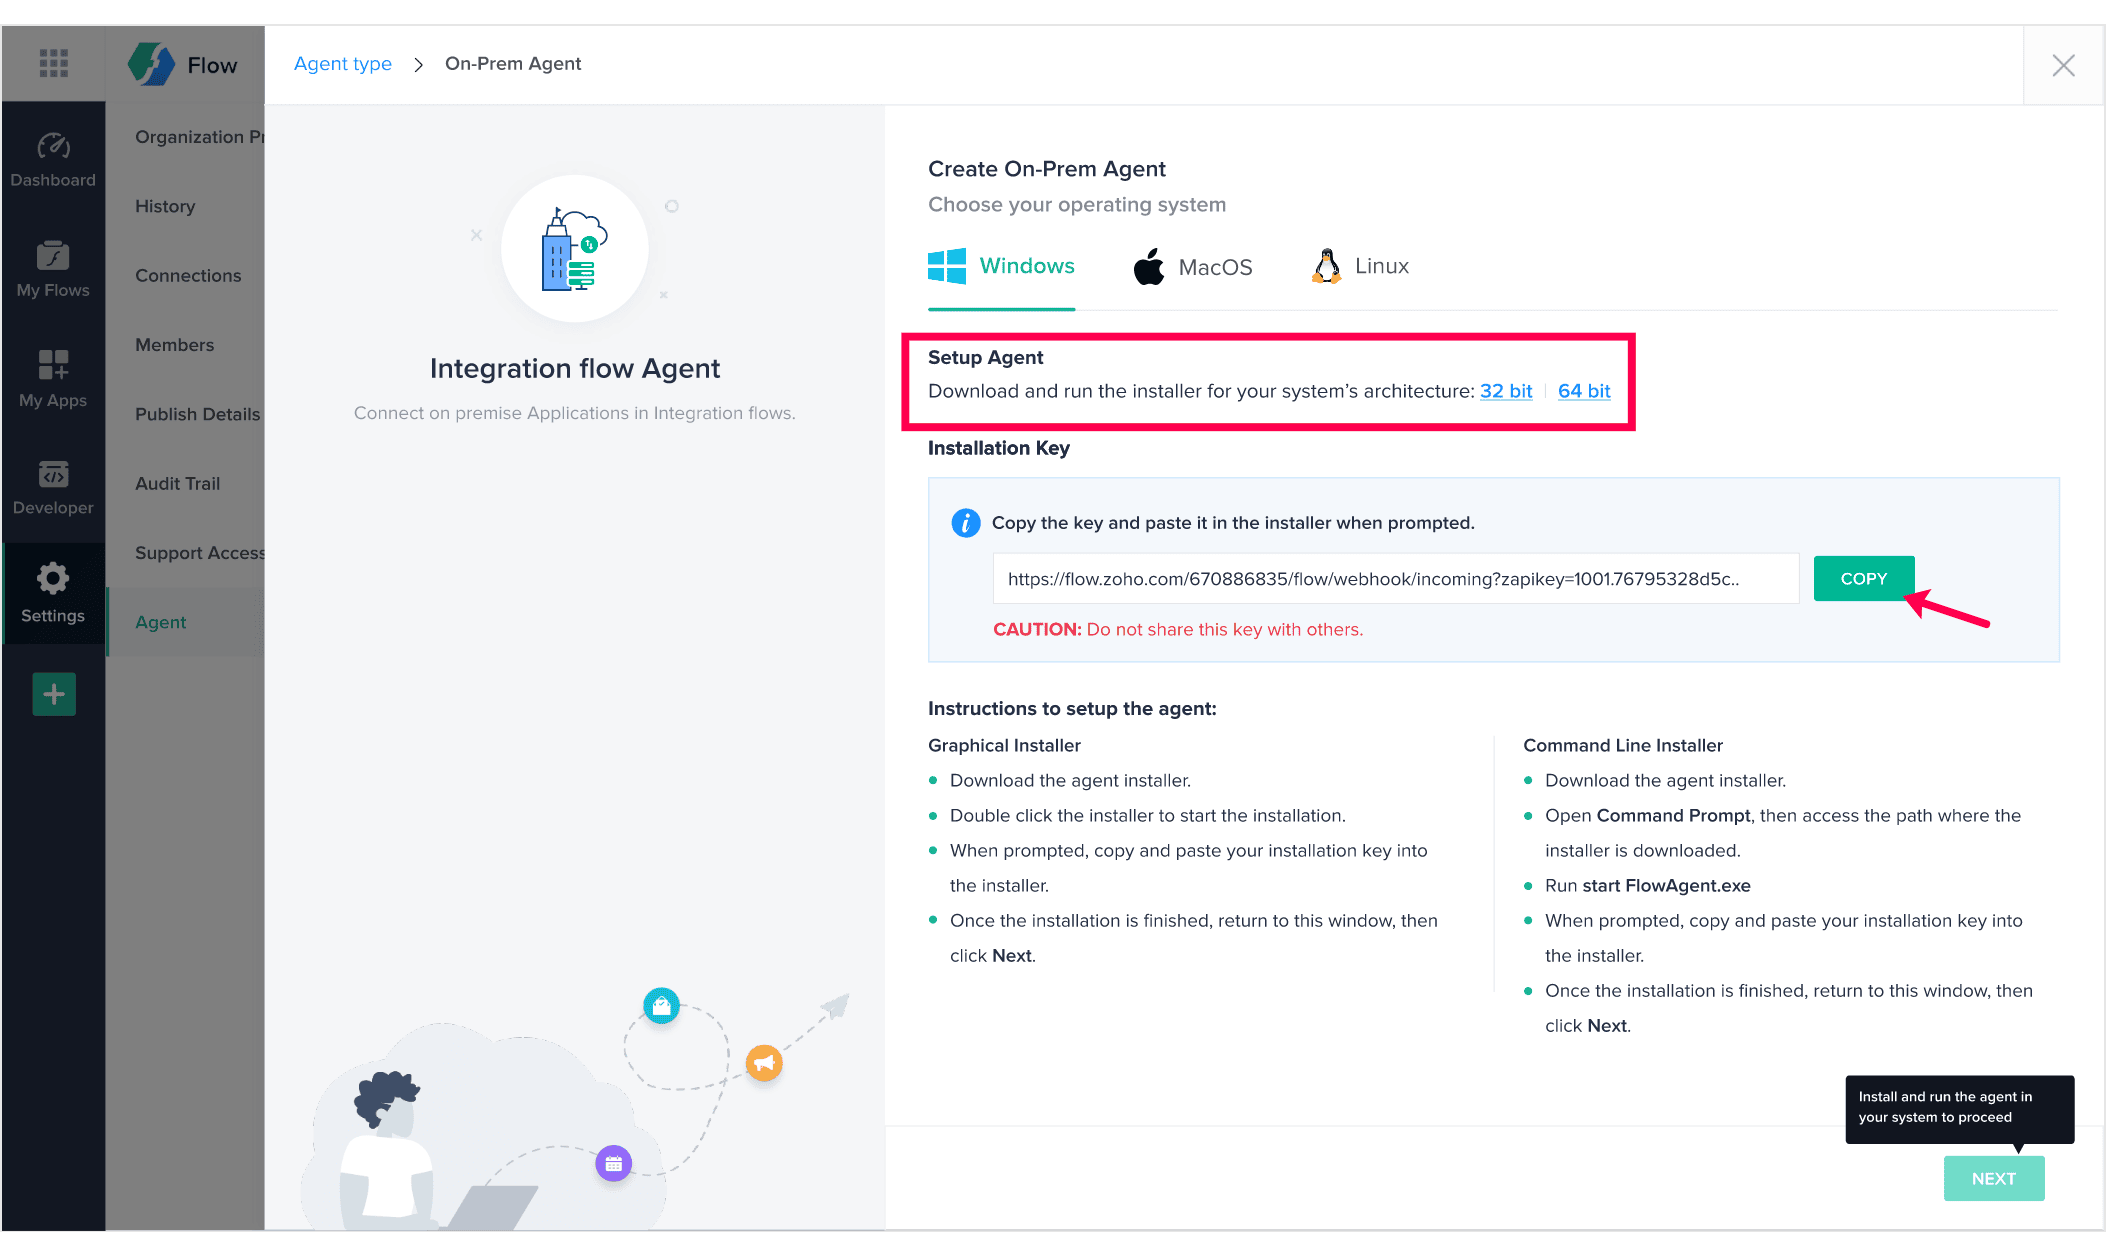
1. From the agent download screen, download the agent installer for your system's architecture (32-bit or 64-bit). Also, copy the installation key.
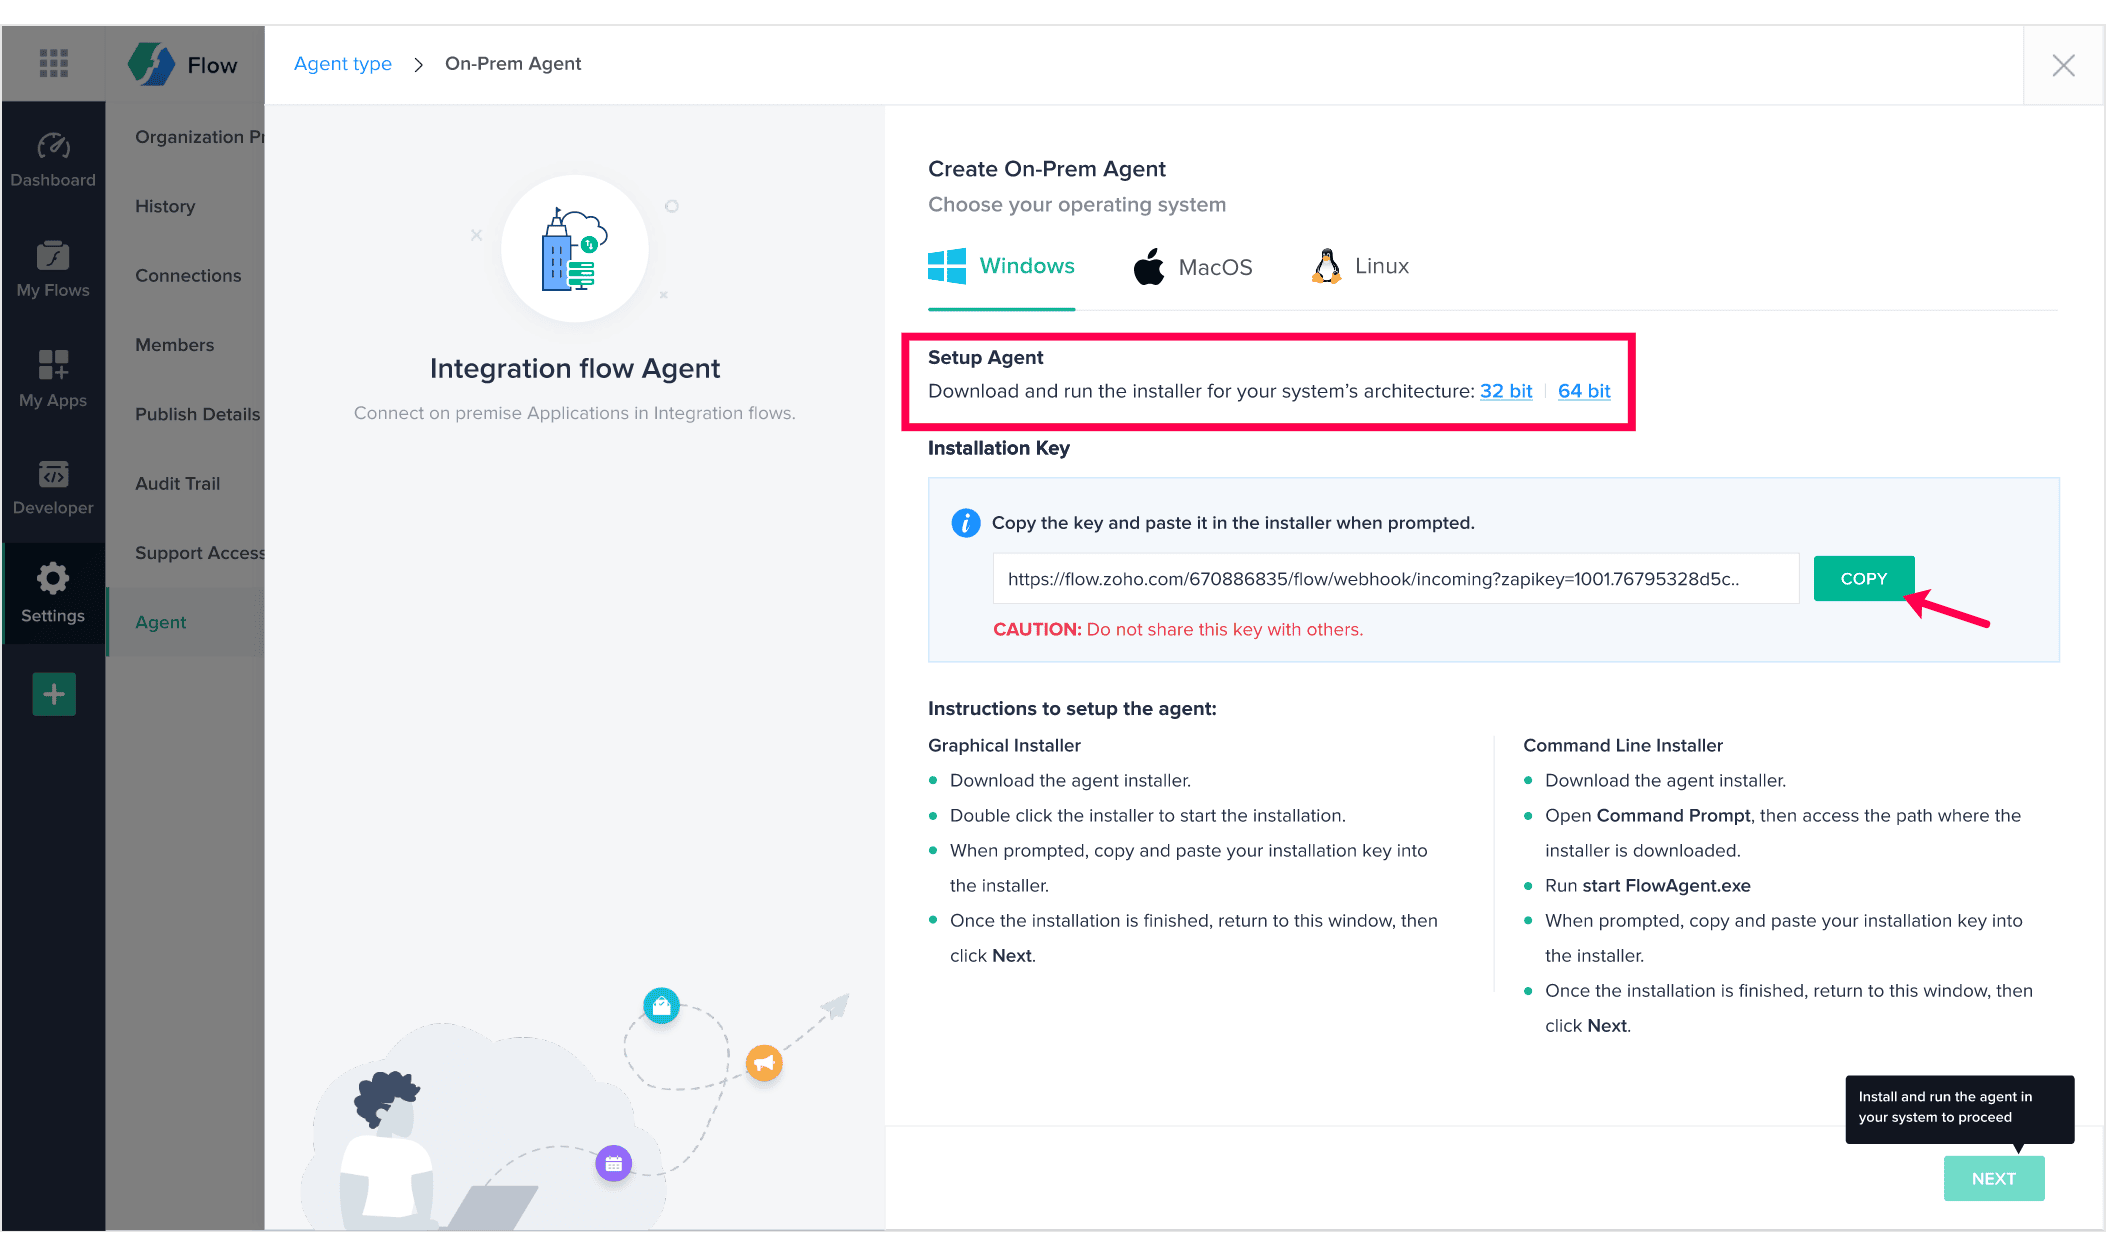
2. Once downloaded, double click the installer to start the installation.
3. When prompted, copy and paste your installation key into the installer.
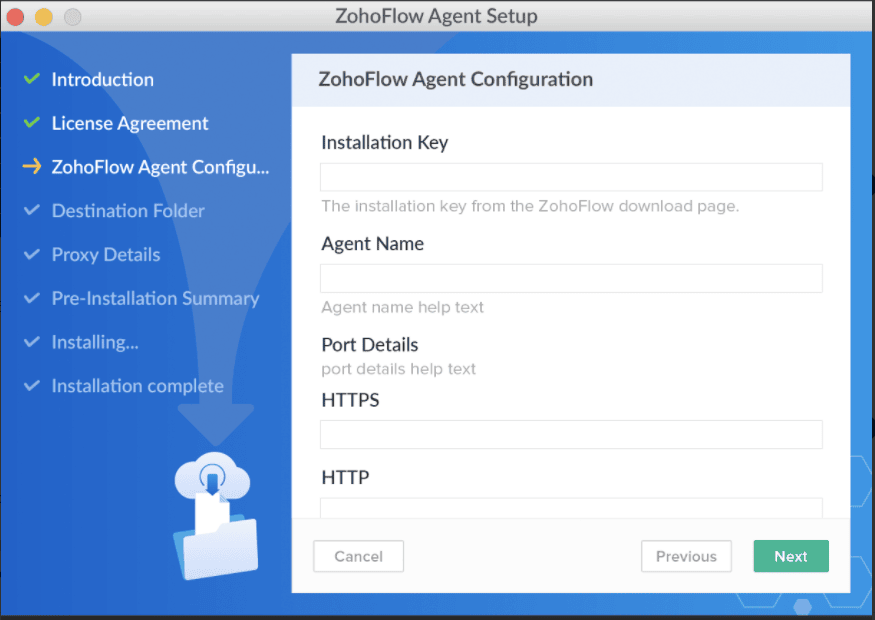
4. Provide a name for the agent, and also configure the proxy details, if needed. Then click Next.
5. Choose the folder where the agent should be installed, then click Next.
6. Once the installation is finished, then click Done.
7. Then return to the Zoho Flow browser window and click Next.
Command line installer
1. From the agent download screen, download the agent installer for your system's architecture (32-bit or 64-bit). Also, copy the installation key.
2. Open Command Prompt.
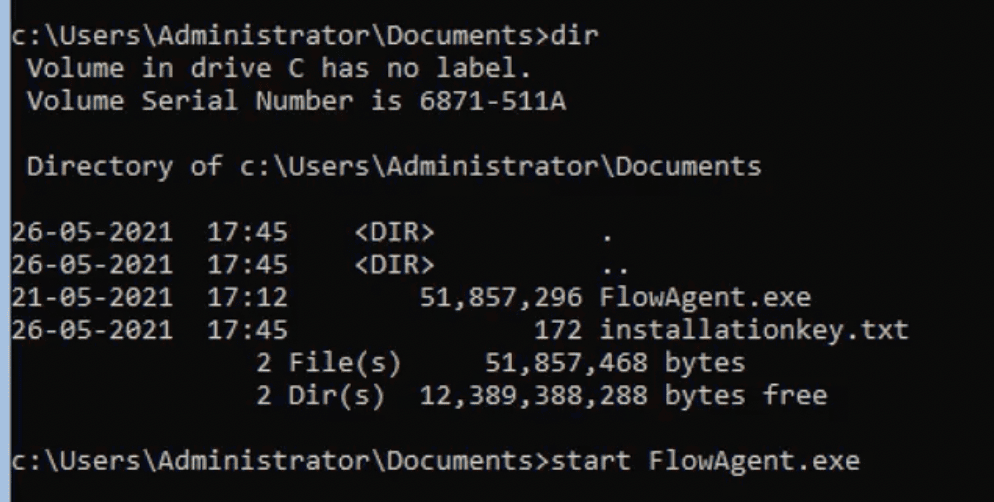
3. List the folder where the agent is downloaded by entering its path followed by '>dir'. For example, if the agent is downloaded to c:\Users\Administrator\Documents, then type in c:\Users\Administrator\Documents>dir and press enter.
4. Press enter again, then enter start FlowAgent.exe
5. The installer will begin to install the agent. When prompted, enter the installation key that you've copied earlier from the browser window running Zoho Flow. Also provide a name for the agent.
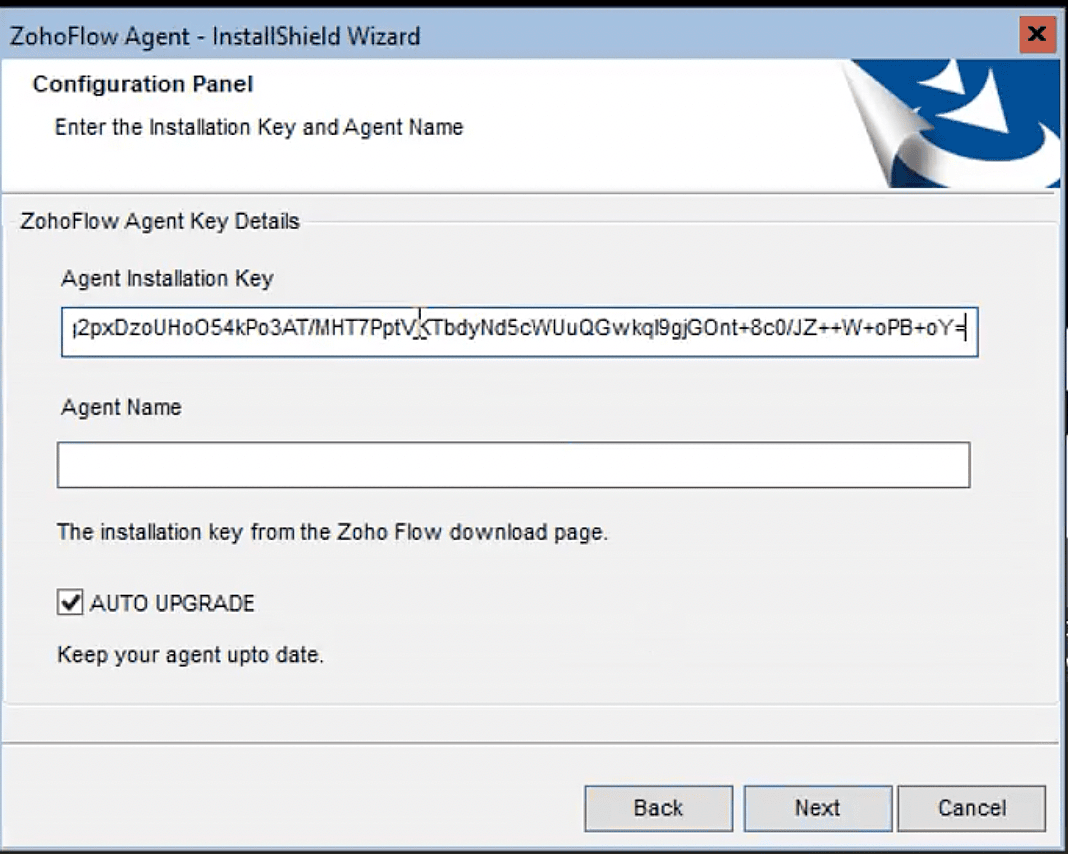
6. Then, click Next.
7. Choose the folder where you want to install the agent. Click Next.
8. When the installation is complete, check the box that says Start Agent, and click Finish.
For MacOS:
1. From the agent download screen, download the agent. Also, copy the installation key.
2. Navigate to the folder where the installer is downloaded, and extract th ZIP file named 'FlowAgent_mac.zip'.
3. Then, double click 'FlowAgent'.
4. You might receive the following warning:
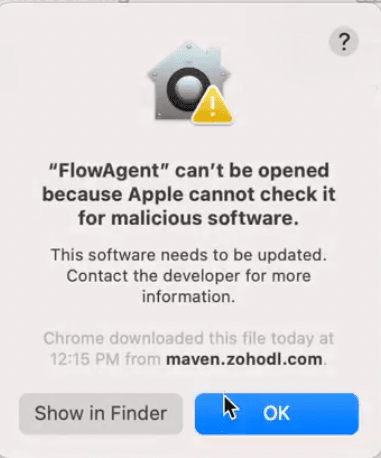
5. You need to allow MacOS to install.
6. Navigate to System Preferences > Security and Privacy >
7. When prompted, copy and paste your installation key into the installer. Also provide a name for the agent. Click Next.
8. Choose the folder where you want to install the agent. Click Next.
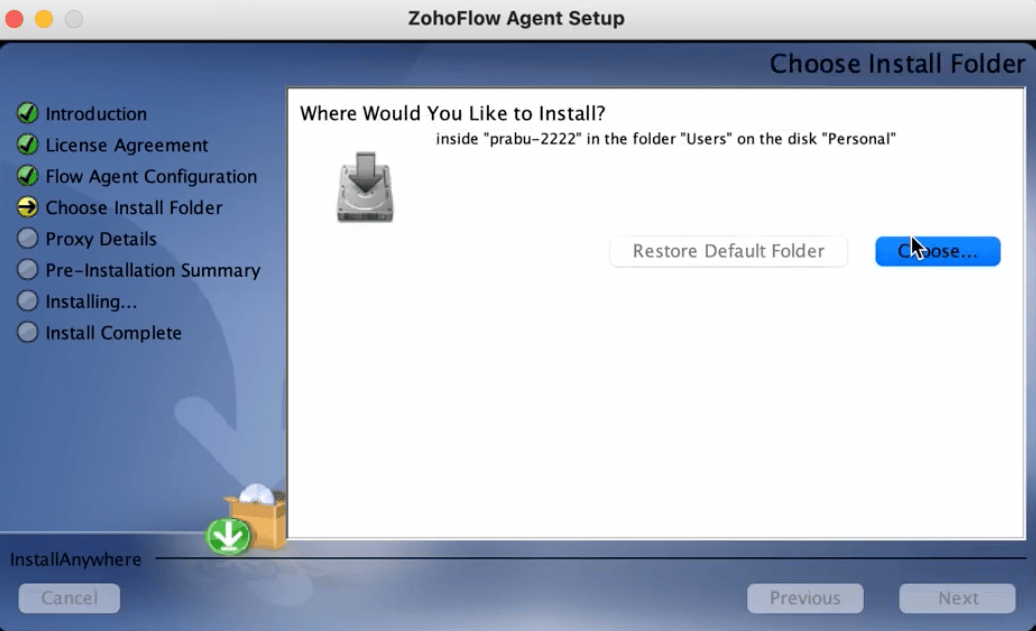
9. Configure the port details, if needed. Then click Next.
10. Review the information, then click Install.
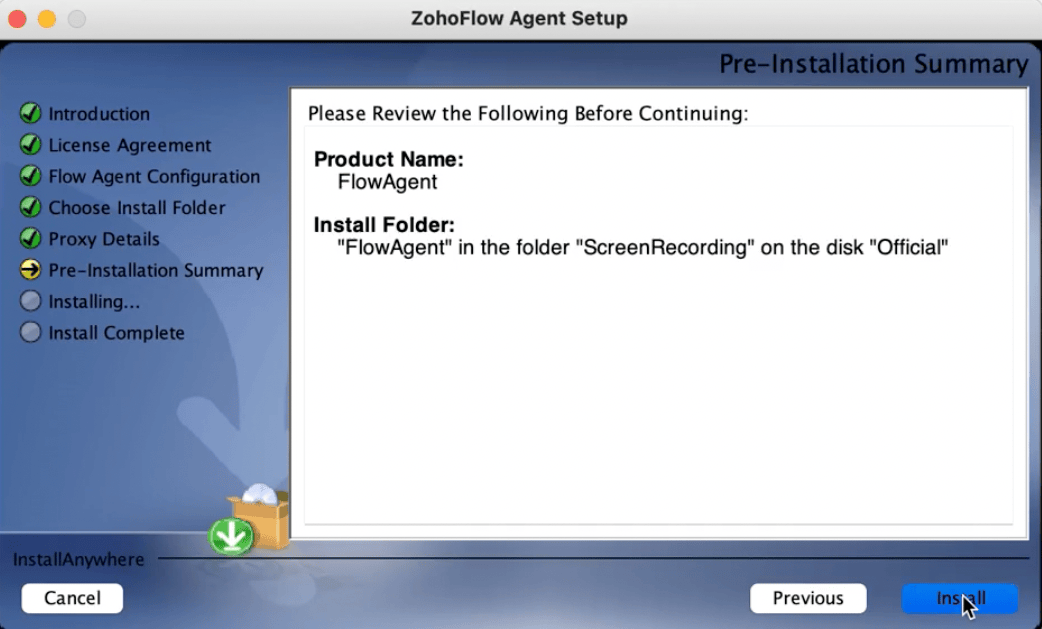
11. Once the installation is complete, click Done.
12. Open Terminal, then enter <installed location>/FlowAgent/bin. For example, if you've installed the agent in =================
13. Then enter sh startagent.sh
14. Return to the browser window running Zoho Flow.
For Linux:
Graphical installer:
1. From the agent download screen, download the agent. Also, copy the installation key.
2. Open Terminal.
3. Enter the path where the installer is downloaded.
4. Enter the command chmod 755 FlowAgent.bin to provide necessary permissions to the installer. Note: This command provides the following permissions: >Can delete, rename, and add files into the directory. >Can change the file's content.
5. Run the installer by entering ./FlowAgent.bin
6. After extracting the components of the installer, the installation window will appear. When prompted, paste the installation key that was previously copied from Zoho Flow.
7. Once the installation is finished, return to Zoho Flow, then click Next.
Command line installer
1. From the agent download screen, download the agent. Also note down the installation key.
2. Enter the path where the installer is saved.
3. Enter the command chmod 755 FlowAgent.bin to provide necessary permissions to the installer. Note: This command provides the following permissions: >Can delete, rename, and add files into the directory. >Can change the file's content.
4. Enter ./FlowAgent.bin to run the installer.
5. When prompted, enter the installation key. Also provide a name for the agent.
6. Enter the path where you'd like to install the agent.
7. Configure the proxy details, if needed.
8. Review the installation details, then press Enter to continue.
9. Once the installation is finished, return to Zoho Flow, then click Next.
Updating the agent
You need to keep your agent (installed on your system) updated at all times to ensure that your flows with on-premise app trigger or action run smoothly. It is advised that you turn the auto-update option ON for all agents.
Auto-update will be turned on by default when you finish installing an agent in your system.
Updates to the agent include:
- Security enhancements
- Additional support for new or updated applications
- Bug fixes and patches
To enable auto-update on:
1. In the Settings section, navigate to Agents.
2. Click View Details adjacent to the required agent.
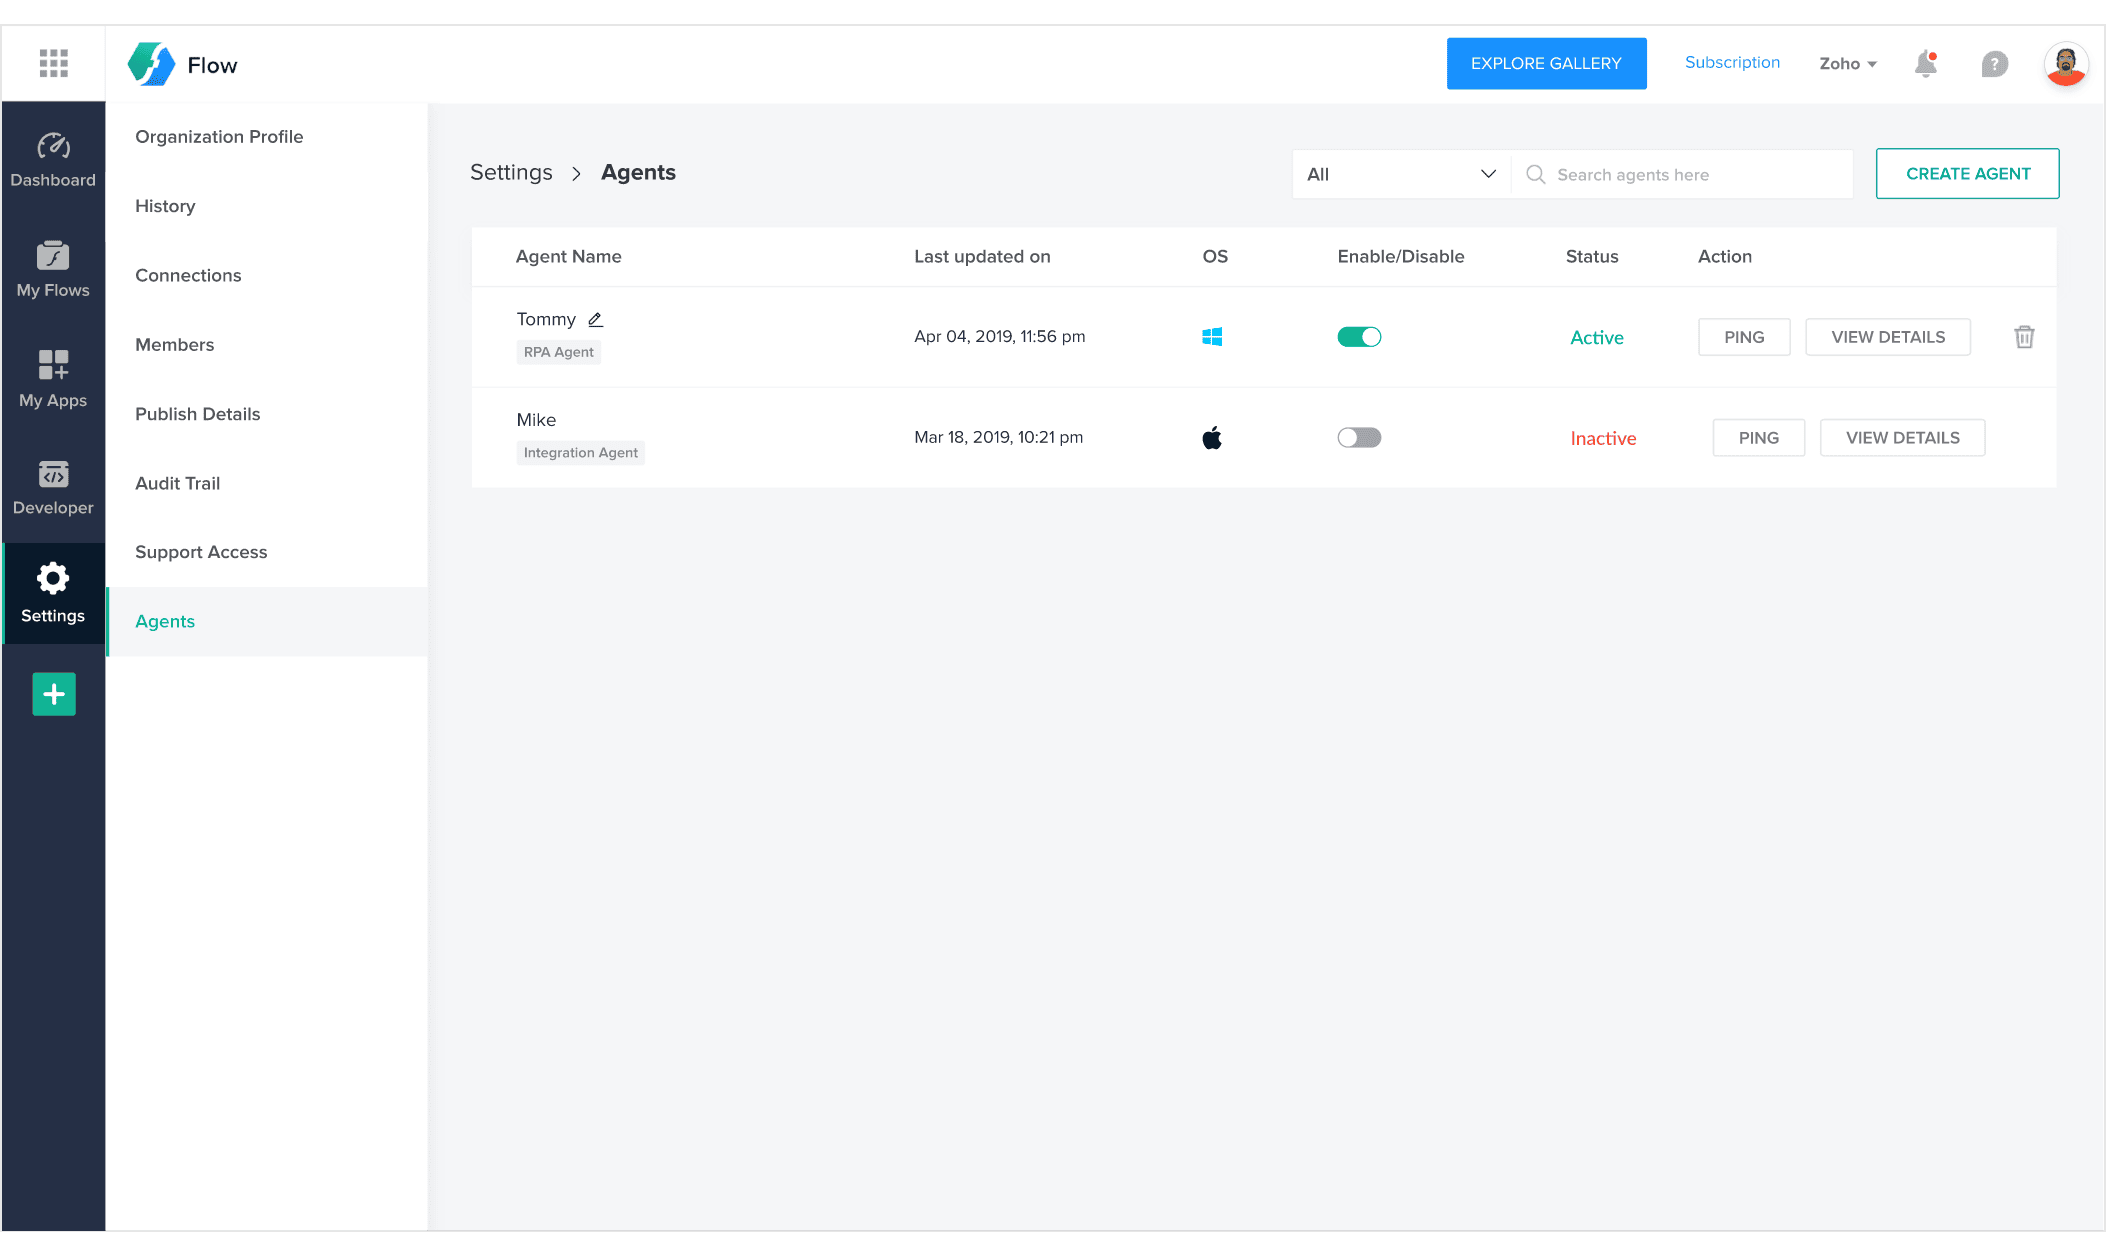
3. Toggle the auto-update switch to On.
Deleting the agent
Deleting an agent will stop all data exchange between Zoho Flow and the machine the agent was installed.
To delete an agent:
1. In the Settings section, navigate to Agents.
2. Click on the Delete button.
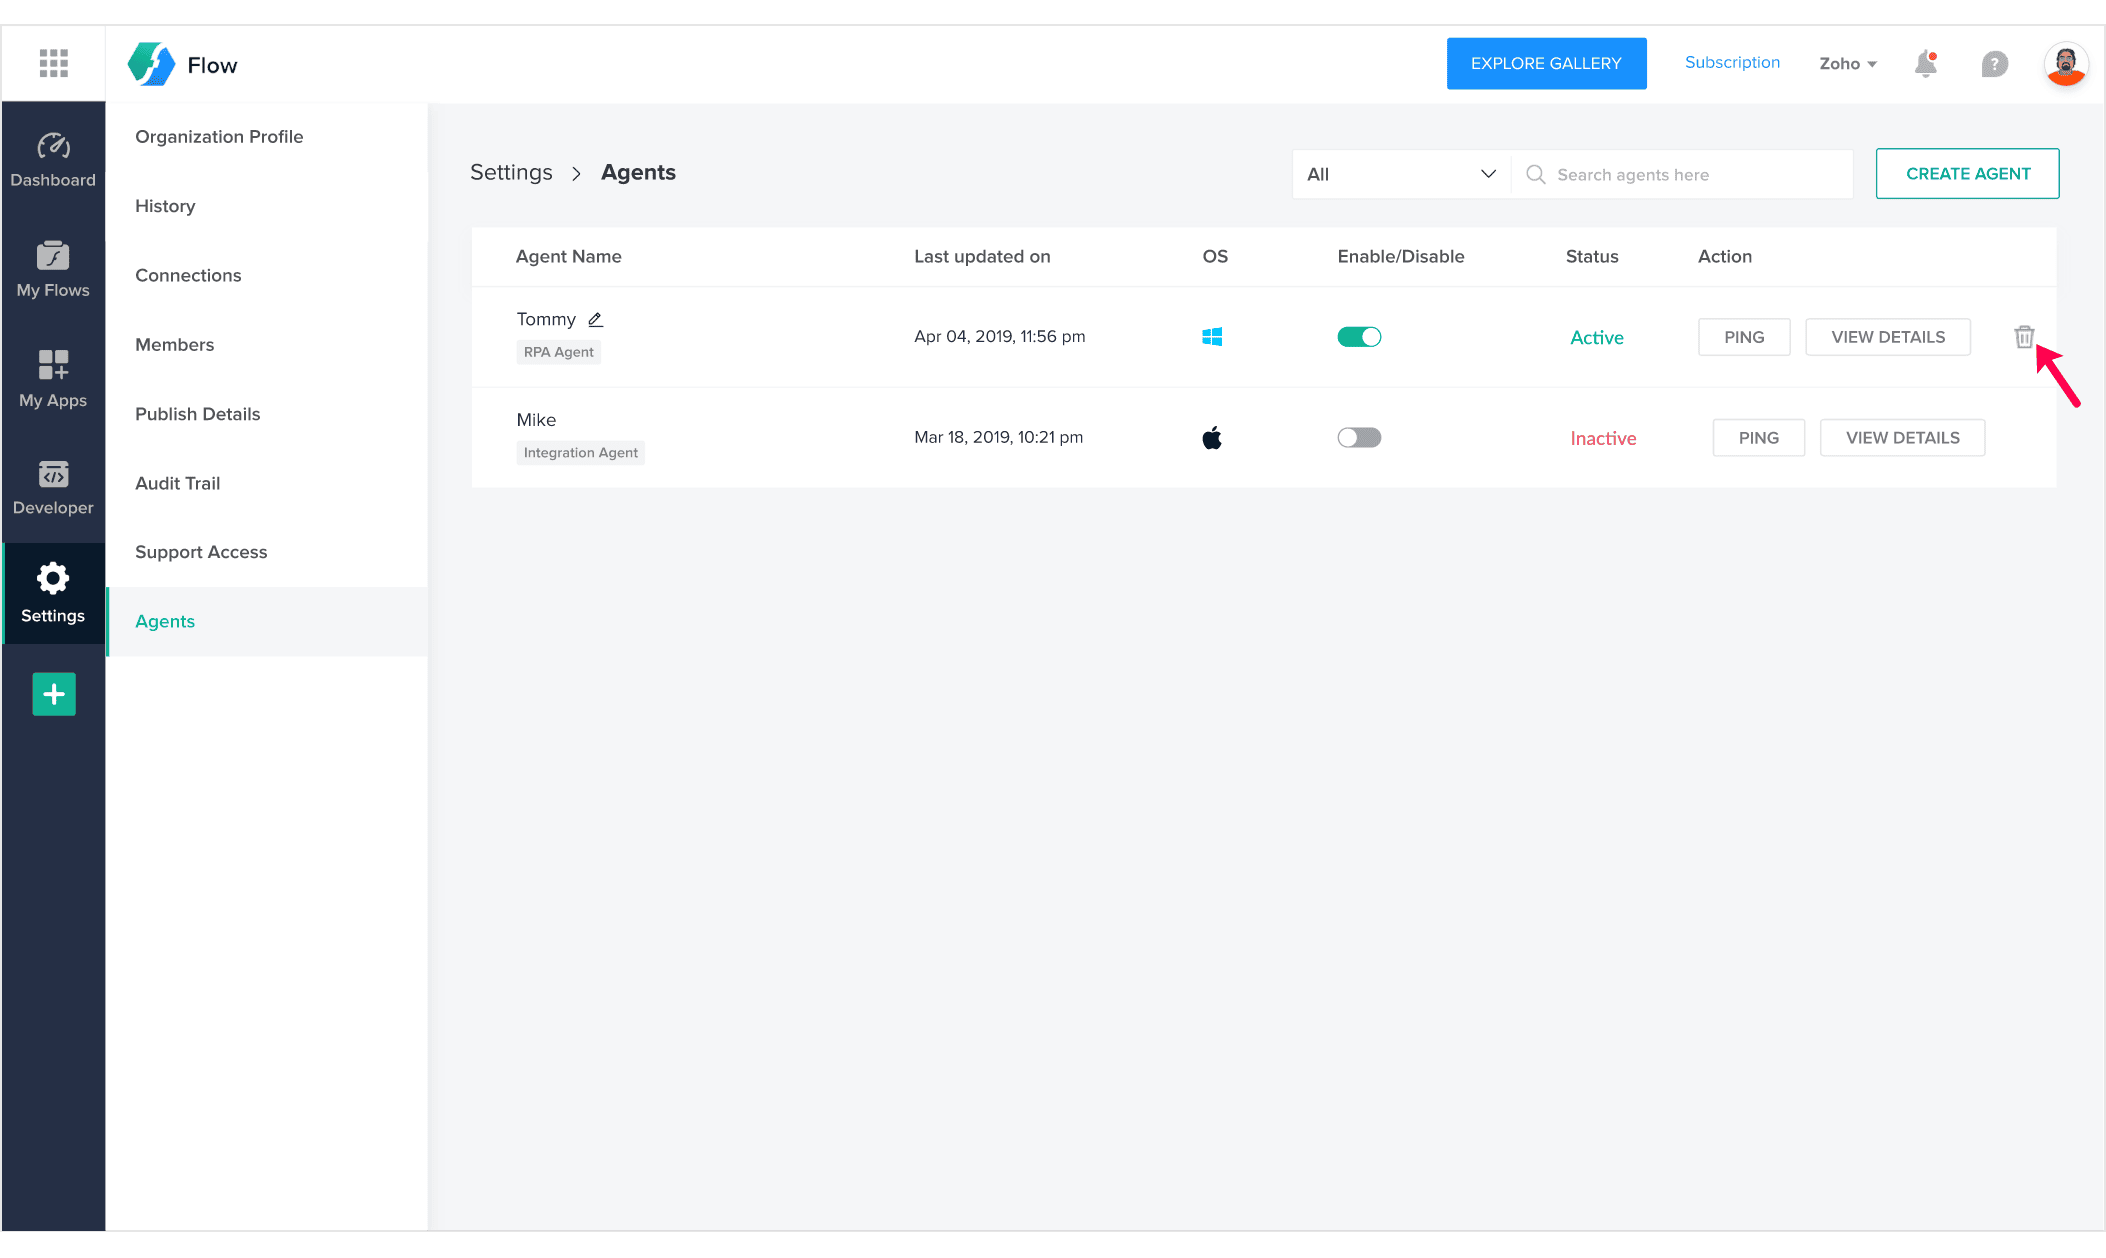
3. You will be notified about all the flows that are using the agent. Once you make sure that you no longer need to keep them live, confirm deletion.

