Asset Notification Rules
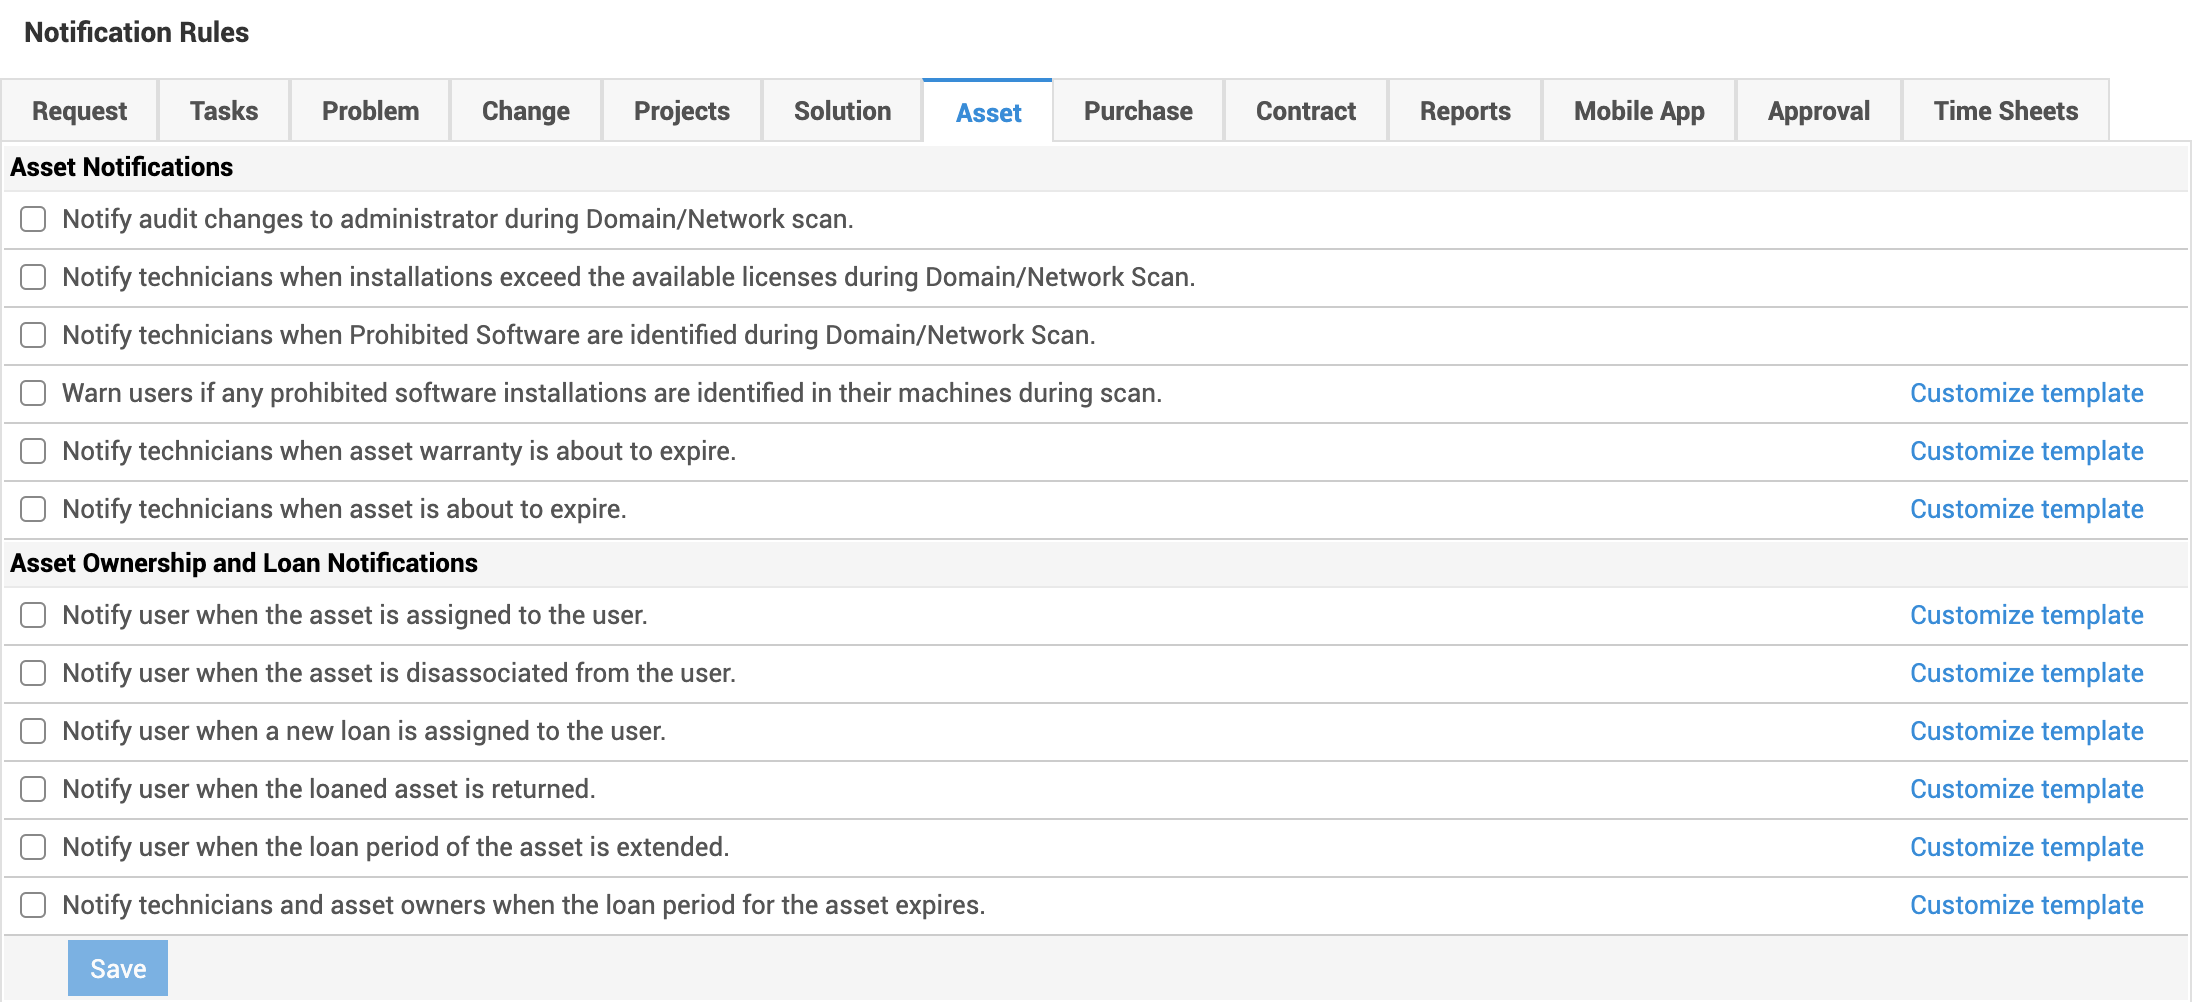
You can configure asset-related notifications under Admin  > Helpdesk Customizer > Notification Rules > Asset.
Here, the notifications are further classified into Asset Notifications and Asset Ownership and Loan Notifications. Notifications that support customizations have the Customize template link against them.

Configuring Notification
To configure a notification,
-
Select the notification you want to enable.
-
For non-requester notifications, choose the technicians or enter the email addresses that you want to be notified using the respective combo box.

You can enter multiple email addresses separated by commas.
For notifications involving asset expiry, warranty expiry, and loan period expiry, provide additional details as described below.
-
Notify Before: Provide a value between 1 and 90 that specifies the number of days before which the notification has to be sent. This is a mandatory field.
-
Notify After: Provide a value between 1 and 90 that specifies the number of days after which the notification has to be sent. This is a mandatory field.
-
Frequency: Provide an integer value that specifies how many times the notification has to be sent based on the values mentioned in the Notify Before and Notify After fields. For example, if Frequency is 5 and Notify Before and Notify After are set to 10, then the notification will be sent 5 times over the span of 20 days with an equal time interval between each notification.
Customizing Notification
For notifications that support customization, you can modify the content based on your requirement. Variables are also supported depending on the notification and the message content will be populated with data accordingly.
To customize a notification,
-
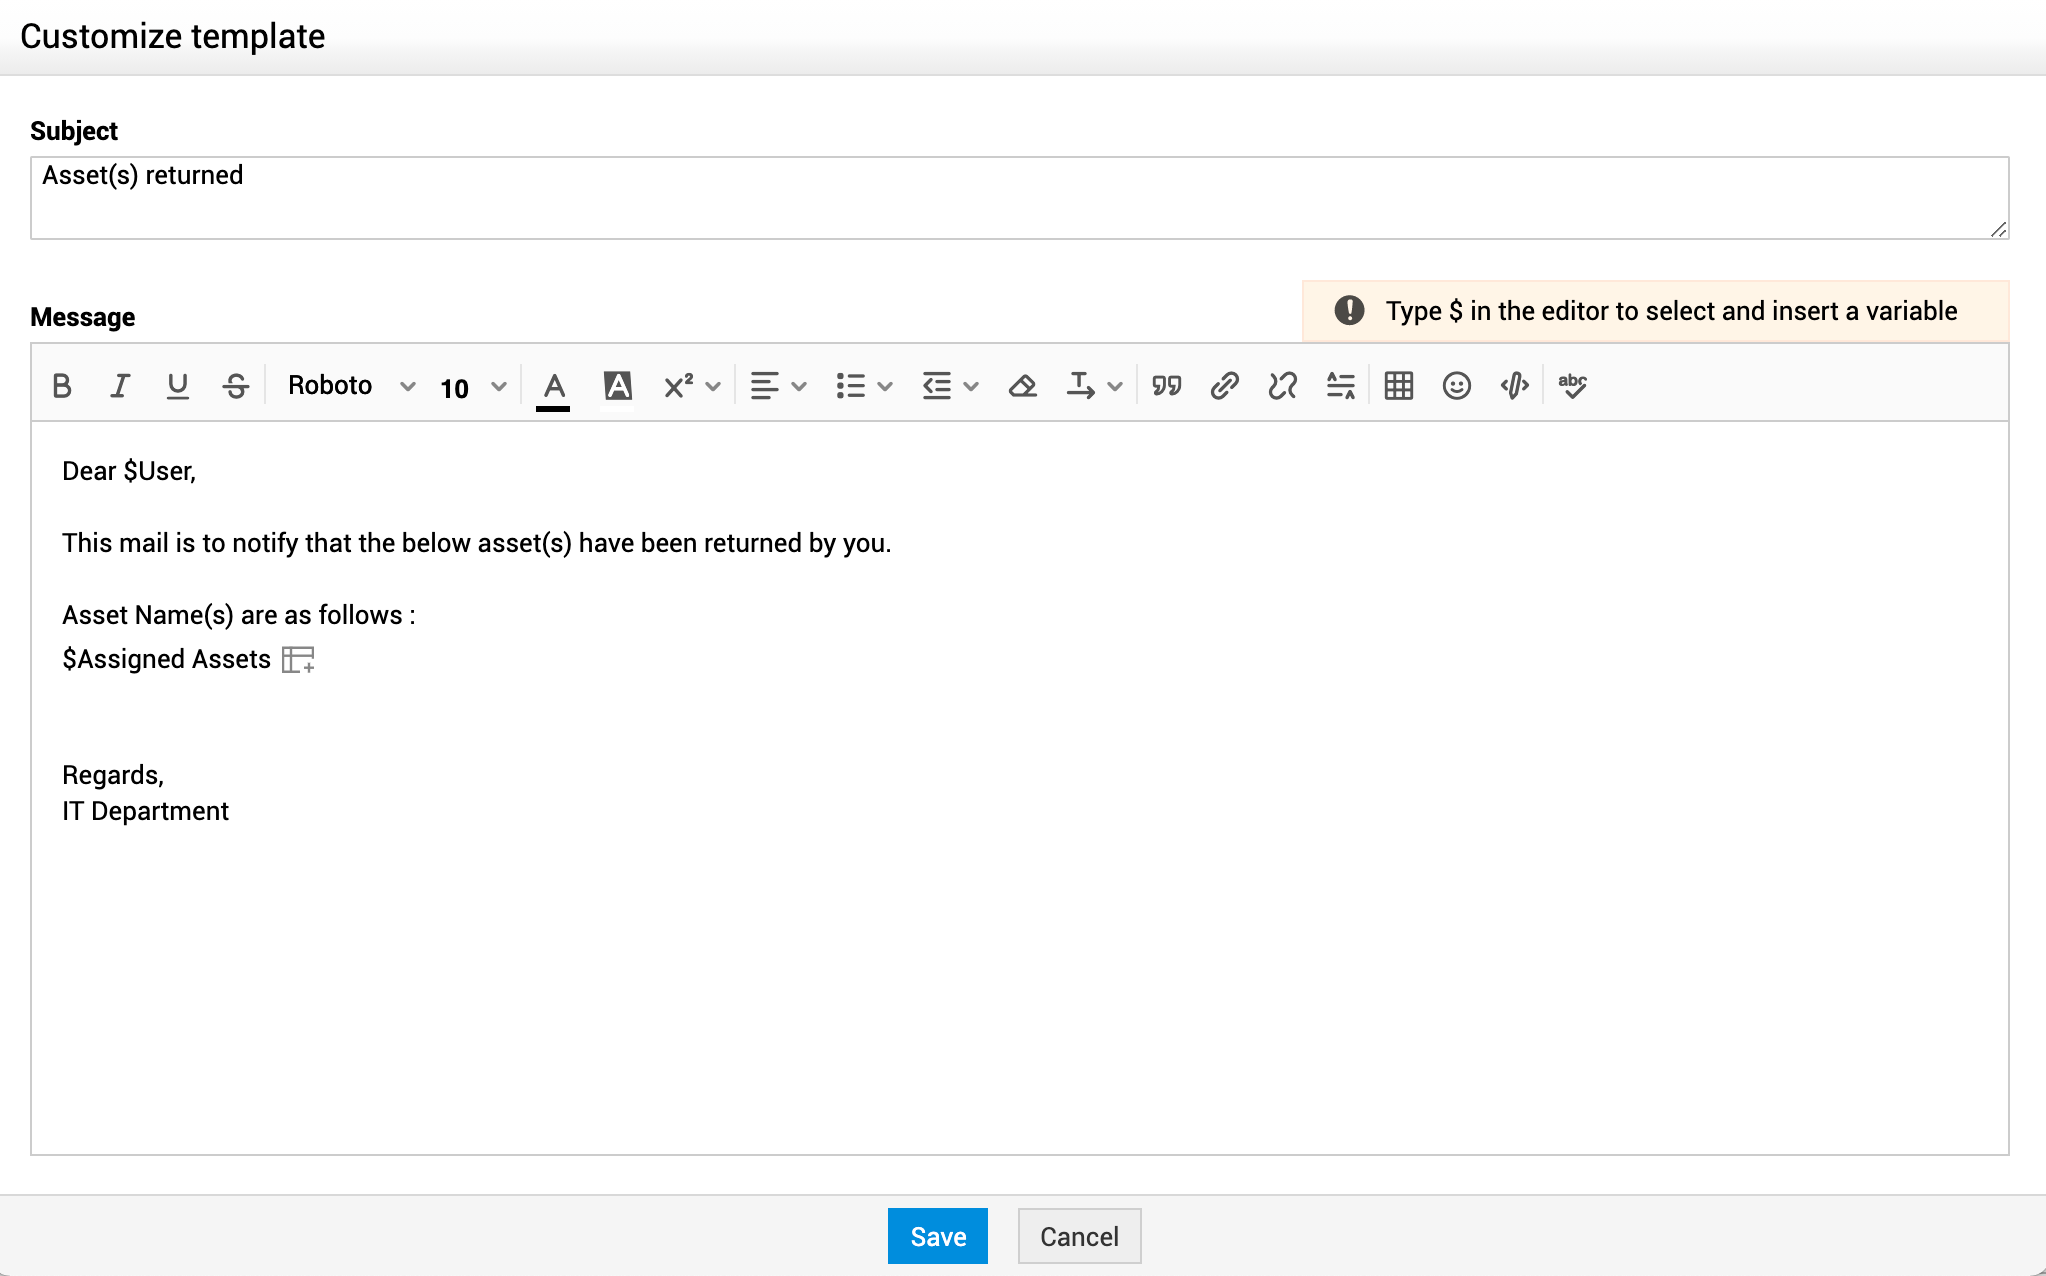
Click the Customize template link against the notification.
-
In the template editor pop-up that appears, modify the Subject and Message as required. To add variables, enter $ and choose the required variable.

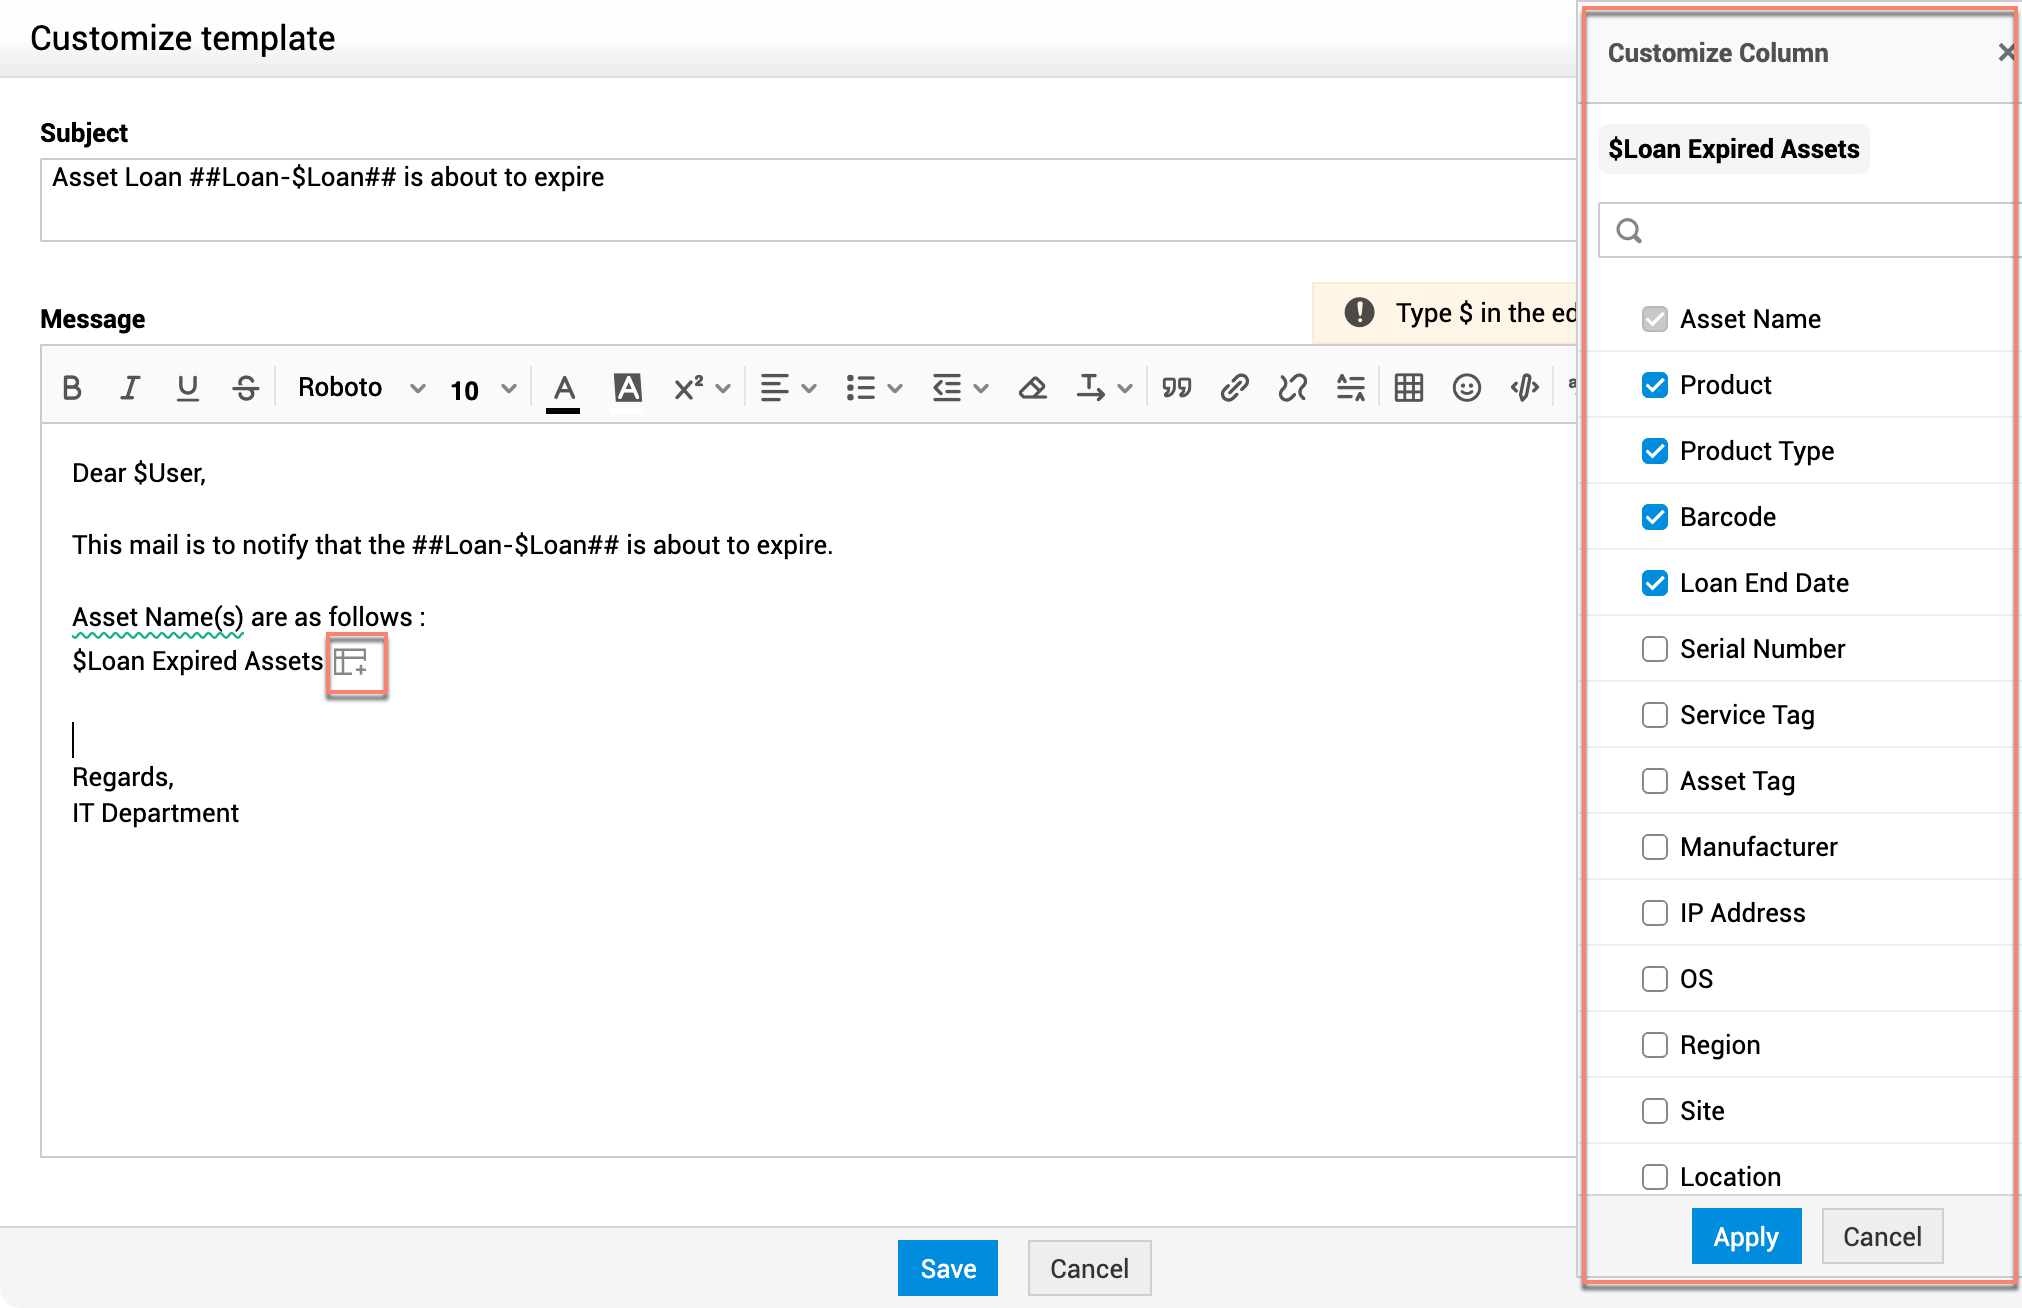
Variables such as $Loaned Assets, $Loan Expired Assets, $Expired Assets, $Assigned Assets provide data in tabular format and you can customize the columns to be displayed.
To customize columns,
-
Click
 against the variable added to the notification template.
 -
Select or unselect the columns on the Customize Column panel on the right side panel.
-
Finally, click Apply.
Both default fields and additional fields of assets and workstations will be listed in the Customize Column panel.


